Showing posts with label Holiday. Show all posts

Sunday, December 5, 2010

Sugar Scrub

We all have those family members or friends that have everything they need or go buy what they want when they want it. This makes Christmas giving very hard. Every year I try to get creative to find something that these people could enjoy! 
I found a cute idea for a Sugar Scrub at By Stephanie Lynn. She provided a super easy recipe for making a sugar scrub. Since my family and most of my friends are in cold Ohio a nice sugar scrub is great for the dry skin of winter. 
I mixed up the brown sugar, sugar, pumpkin pie spice and sunflower oil and that was that! Then I scooped it into canning jars. I created a label on picnik.com and cut a small piece of fabric for the lid. The whole project was completed in a very short time and partnered with a couple other items will make a great gift!

Thanks By Stephanie Lynn, I Copied That!

Wednesday, November 3, 2010

Happy Halloween!

After all the craft projects we were finally ready for the big day! 
And a big day it was; Jake's first trick or treating!
This was the full gear for the costume. Cute right?
Now the best part... a couple days before Halloween there was a mysterious backhoe parked at the end of our street. No one was quite sure why but I did not care. Jake got all dressed up and we went down for a photo shoot!
Off to work!
He could not have been more excited!
Yes, he pulled out his screwdriver to 'work' on the wheel!
Could he be any cuter?
Ok, Ok back to Halloween.
We all had to dress-up for our neighbor's birthday party before trick or treating.
Trick or Treat!
What a fun night!


Tuesday, November 2, 2010

Toddler Tool Belt

I was done to the wire getting Jake's Halloween costume finished in time and what happened?? BROKEN SEWING MACHINE! (of course!)
AHHHHHHHHHHHHH
What to do? There is nothing to do but get CREATIVE! I still needed to make the tool belt for his costume and I had a basic outline for doing so from The Creative Maven. 
Her plan used a place mat to create the tool belt. I loved this idea because I knew that he would be rough with it and I wanted it to last so he could use it for dramatic play. I decided that I could pull this off using a GLUE GUN! Thanks to A Girl and a Glue Gun for inspiring projects using a glue gun!
This plan could not have been easier especially using a glue gun!! All I had to do was fold the place mat in half then fold one side down one inch. I glued the half inch down then glued the sides down. I added a loop for the hanging hammer. I also glued binding to add a bit of embellishment.
I glued the strap on the back of the tool belt. I already had bought the clip to open and close the straps and I just put it on with a bit of glue too! I am telling you, SUPER EASY! And I still think it looks cute! I did not tell anyone it was glued and no one noticed. So make a tool belt for your little one today! 
Thanks The Creative Maven, I copied that!


Thursday, October 7, 2010

Trick or Treat


I picked up this little orange bag at Michael's Crafts. It was $1.00 and I knew I could make this little bag a cute Trick or Treat bag for my guy! I had some extra reflective tape from the construction vest so I thought I could add that and maybe some paint to represent a pumpkin.

I made a stencil, just out of paper, and used this glitter spray paint. It had a squirt top so it was very easy to use. I then outlined the face with some fabric paint. One side done. Check!
Sorry not a great pick, but you get the idea!
On the other side I decided to get a little more creative! I saw the cutest idea from a post on a Halloween Round-up but my computer went dead and I lost the site! Boo! I had to work from my memory. The basic idea was a spider web made out of black floss and a spider out of a button. Super cute! Here is what I came up with...
I had to make this picture extra large because, come on, it is too cute!
After attaching the spider, button, I went over two holes with bright yellow to make the eyes. I felt like the bag needed something more so I stitched his name down at the bottom and stitched a black dotted line through the handles. After all the stitching I needed to add a lining. I put a black lining in the bag with some extra fabric I had laying around. 
Hopefully this bag will not only be used this Halloween but for more to come!
Sorry I can't give credit random blogger, but I copied that! Thanks!

Edit:
I was not completely satisfied with the pumpkin side of the bag so I added some more embellishments. I added a pumpkin shape around the face and wrote Trick or Treat. Much better!


Saturday, September 25, 2010

Mr. Builderman-Halloween Costume

So excited for Halloween! 
I have been thinking about what the little guy should dress up as for his second Halloween. Although the hubby thought Jim Tressel (Ohio State Football coach) would be cute, I thought it would go over the heads of people in Nashville. While the discussion continued our neighbors started construction on a new screened in back porch. Jacob loved watching and listening to all of the work being done. He even says bang, bang now in reference to the hammering. He received a tool box with tools for his birthday, so he has been carrying around a hammer for a few weeks now. So without many words, he was able to tell us what he wanted to be for Halloween!
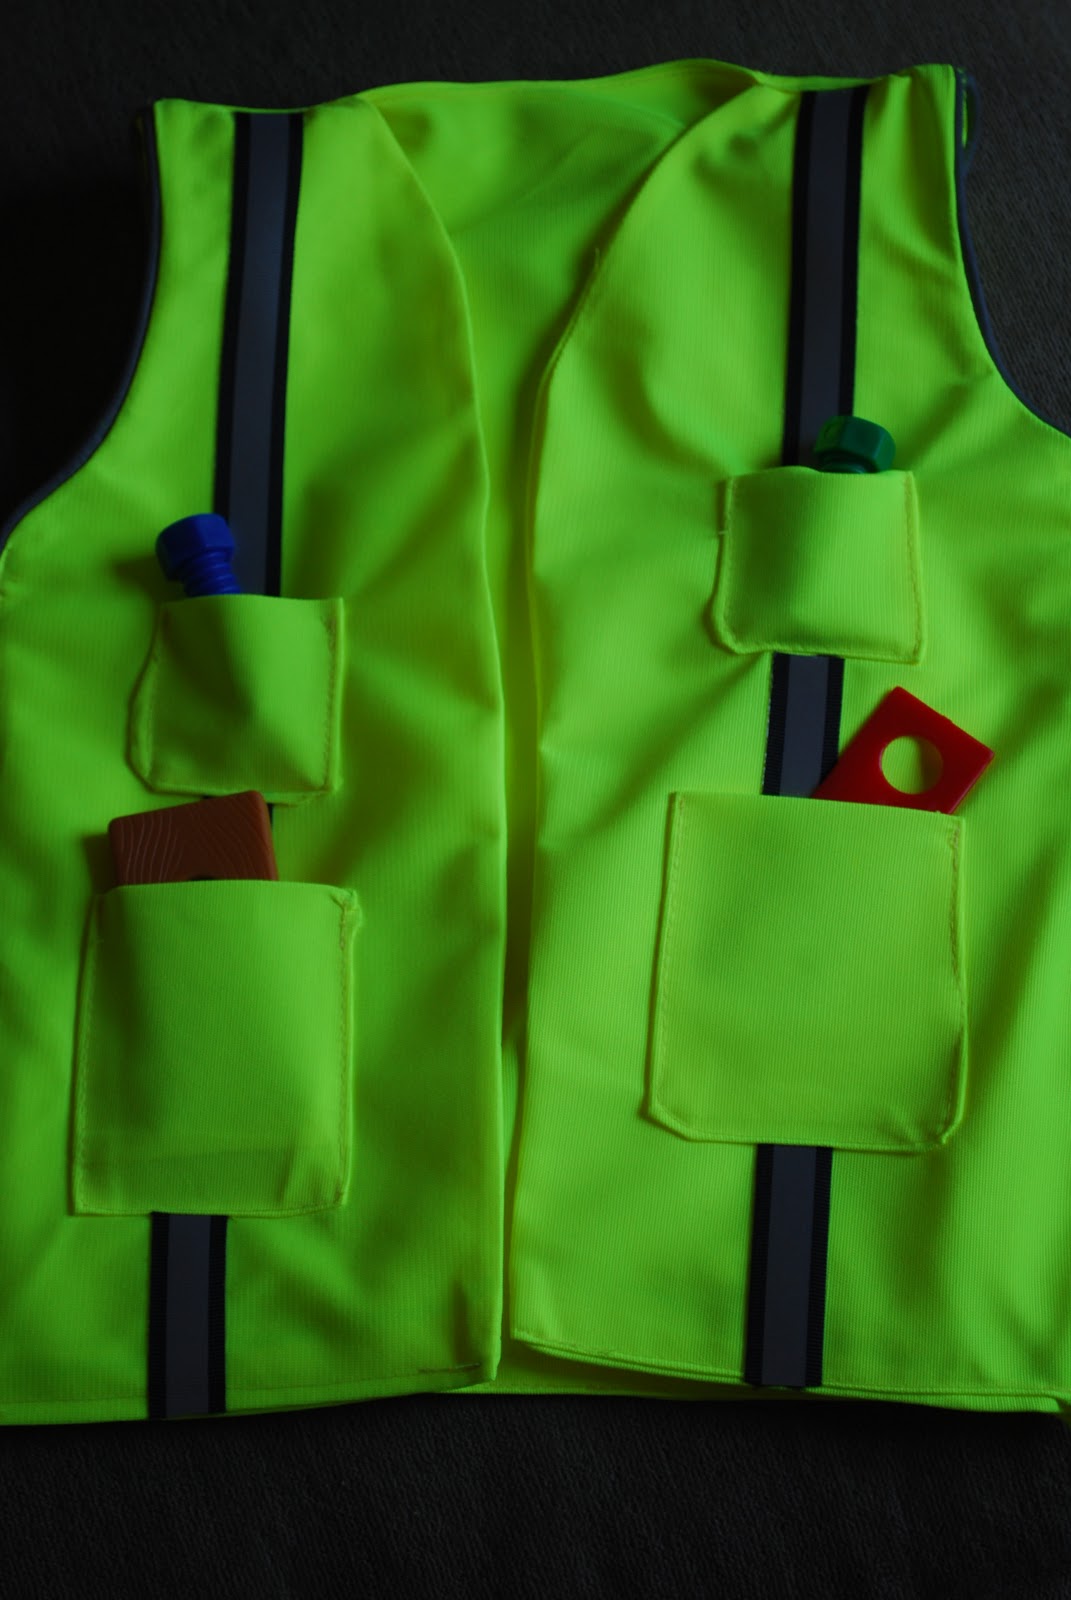
I searched and searched for a cute builder costume with no avail. Everything I found was plastic and cheap looking. The crafter in me knew I had to create a costume for my little man! I wanted something cute, of course, but something realistic. Looking at the workers next door did not give me much inspiration, being that none of them wore hardhats or tool belts?!?! So I went to google images and searched out inspiration there. I decided a florescent vest with reflective tape would help the look along with a tool belt and hardhat, of course. 
I started with some knit fabric and reflective tape. I also bought some velcro to use to close the vest but I did not end up using the velcro. I just sketched out a bit of a plan then traced one of Jake's jackets to get the size correct.
(I tucked the sleeves behind the jacket)
I double layered the fabric to give the vest some weight and make it sturdier. (Knowing my boy!) As I worked Jake woke up from his nap. I was so excited about the project I tried to keep working on it while he played. (Right!) He decided he needed to be up on my lap helping the whole time! It was actually really cute! But after I accidentally sewed the arm hole closed I decided it was best to pick up the project later! :)
It ended up being a good thing because I had some good embellishment ideas and decided to add pockets.
I used reflective binding at the sides of the vest where I sewed the front and back together for added detail. I also added the reflective tape to the front and back of the vest. 
*Warning: 
Please read disclaimer before viewing final project

Disclaimer: I am NOT a seamstress! I just teach myself and do the best I can!
Ok so it is a little crooked and the pockets are not even I am not selling it and isn't it the thought that counts? Come on when it is on you cannot really even tell! (Or at least that is what I am telling myself!)
It is kinda cute, right?
Back
Now I just need to make the tool belt! FUN! Stay tuned!


Wednesday, March 3, 2010

Easter Basket

When I was a little girl my Meme gave my sister, my brother and I wooden Easter baskets that year after year would be filled with goodies from the Easter Bunny. It was always a special time for us and a tradition that was exciting throughout our childhood. I love the idea of starting family traditions now that I have a son. As Easter rolls around I knew I had to make him an Easter basket he could use throughout his childhood. 
   
I found this blue basket at JoAnn's and got the accessories there as well.
*Two sheets of scrapbook paper
*Ribbon
*Raindrop and alphabet stickers
*Two wooden eggs and a wooden bunny
(I had the brushes, Mod Podge, paint and glue gun on hand.)
I started by covering the bottom of the basket in 'grass'. I cut it to size and Mod Podged it down. Then I cut strips of the striped paper. I Mod Podged them on the handle and the inside rim. I then put the ribbon around the top and bottom outside rims. I painted the eggs and Easter Bunny then I hot glued them on the basket handle.
Hopefully my little guy will come to love his Easter basket year after year!